
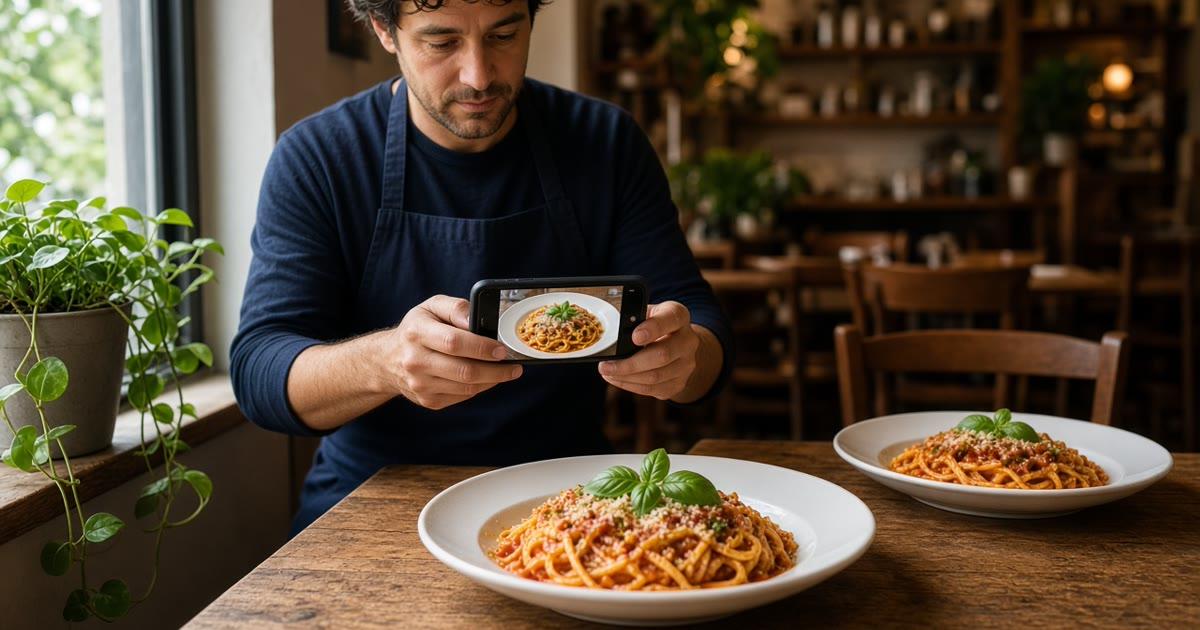
Restaurant food photography tips, for an independent owner, start with the phone already in your pocket and the plate you were going to serve anyway. The photo on your online menu is the dish a guest judges before they tap to add it. A studio is optional. A true picture of your food is not.
This post stays on that picture: light from a window, an angle that shows the portion, and which dishes to shoot before the rest. How those photos sit inside categories, modifiers, and the cart is online ordering menu. The guest-facing site they land on is online ordering. Stay here for the camera.
Shoot the Plate You Actually Serve
The photo has one job on an ordering site. It should look like the plate that will come out of the bag. A guest who orders the pasta should recognize the pasta. A taller stack, a greener sauce, or a garnish you do not send becomes a complaint at the handoff.
Use your plate, your portion, and the garnish the ticket already includes. If cheese is a paid modifier, do not bury the dish in cheese the guest did not order. If the lunch portion is smaller than dinner, shoot the portion you will sell online, or shoot both and label them in the item name.
Skip stock photos. They are not your oven, and a regular will know. You control the photos on the storefront. That control only helps if the file is a plate from your kitchen.
Lighting From the Window You Already Have
Put the plate beside a window. Side light shows texture: the crust, the gloss on a sauce, the herbs on top. Overhead kitchen lights alone tend to flatten the food and push it yellow. If the room is dark in the late afternoon, shoot earlier.
Cloudy light is kinder than hard sun. Direct sun blows out a white plate and throws a black shadow across the bowl. If the window is harsh, move the plate back a step or hang a thin white curtain. You do not need a lighting kit.
Wipe the phone lens first. Fingerprints turn every photo gray. Rest your elbows on the table and tap the food on the screen so the focus sits on the plate, not on the chair behind it.
Turn the Flash Off
The phone flash is the wrong light at this distance. It blasts the front of the dish, washes the sauce, and draws a hard shadow behind the plate. Turn it off before the first item, and check again if the camera app restarts.
If the window is not enough, add a lamp from the side and keep it out of the frame. If the food on the screen is a different color than the plate in front of you, do not publish that frame.
Angles That Show the Portion
Match the angle to the shape. A bowl, a pasta, or a plated entree usually wants a three-quarter view, about halfway between overhead and straight on, so the guest sees the surface and the height together.
A tall sandwich or a stacked burger wants a low side view. Overhead hides the layers. Get down near the table. Do not shoot so low that the plate becomes a wall.
A pizza, a flatbread, or a tray wants overhead. Keep the phone parallel to the table so the circle stays a circle. Fill the frame with the food, leave a little table at the edge, and use a similar distance for every item.
Which Dishes to Shoot First
Shoot the dishes people already name at the counter. Those are the photos that will be tapped this week. A full gallery can wait. Eight to twelve honest pictures of the usual plates will do more than a perfect photo of a special you run once.
Second, shoot the item a first-timer cannot picture from the name. A house salad is easy to imagine. A baked pasta with a name only your regulars use is not. If the description has to do all the work, the photo is late.
Third, shoot one add-on you would offer out loud, if the photo is the real add-on. A side, a dessert, or a dipping sauce. Put that choice on the item as a modifier with the price in the open. Do not photograph a combo you do not sell. The buttons around the photo are covered on online ordering menu.
Leave the Sold-Out Special Off the Camera
Do not spend the hour on a dish you 86 most nights. A photo of food you cannot make is an order you will have to refuse. When the pan is empty, remove the item in restaurant admin and the storefront updates. The photo should leave with the item.
If a special is real for the week, shoot it the morning you put it on the menu, and take it down when the pan is done. Last month's special still sitting online teaches guests not to trust the list. The habit of keeping that list current is restaurant menu management software.
One Background, One Distance
Use one surface. The wooden table you already have is enough. A busy cloth or a drink you do not sell will steal the plate. Ingredients that are actually in the dish can sit at the edge. A second meal in the frame does not belong there.
Keep a similar distance as you move through the list. Crop a little if the edge is messy, straighten the plate, and stop. Do not push the colors until the sauce is a red you do not serve. Guests compare the picture to the bag.
Put the Photos on the Online Menu
The file belongs on the item, not only in the camera roll. On the MicroSky Food storefront you set the photo, the description, and the price. Categories, sizes, toppings, and modifiers are not capped. A short description should cover heat, what comes with it, and the portion.
Change the photo in the same place you change the price. You should not need a web person for a dish you shot this morning. That surface is restaurant admin. Hours and order history in the same login are restaurant ordering software.
Look at the item on a phone before you tell regulars. If you have to pinch to see the food, the crop is wrong. The live demo is a storefront you can compare for layout. Your photos should still be your plates.
A One-Hour Shoot Before Service
Pick a calm hour after prep and before the rush. Line up eight to twelve dishes and start with anything that wilts or melts. Work in one pass: wipe the lens, flash off, window at the side, two frames, check the screen, next plate.
Then place one test order of a photographed item and read the ticket. The photo got the guest to tap. The modifiers still have to be right. If the cooks say no onion, the button should say no onion.
- Window at the side of the plate, flash off.
- One angle per dish shape: three-quarter, low side, or overhead.
- Bestsellers first, then items a name cannot explain.
- Same plate, similar distance, light color edit only.
- Upload, then order the item once on your phone.
What the Online Menu Costs After the Photos
The photos sit on the ordering site, which is included on every plan. On pricing, Standard is $249 per month plus 5% of net sales, or $499 per month with no commission. Only that $499 Standard option has no commission. You do not need a higher plan to put photos on the menu. Growth is $499 per month plus 7% of net sales, after 3 months on Standard. It adds a branded iOS app, a website redesign, app push, and monthly SEO for 5 keywords. Growth Plus is $999 per month plus 10% of net sales, after those same 3 months, and adds email, SMS, and 10 keywords. There is no published Android app. A 30-day free trial does not replace the 3 months.
Apple Pay is on Growth and Growth Plus, through Authorize.net, not on Standard. Hardware is $500 one-time if you need a mini PC print server and a receipt printer. The camera is the phone you already have. Admin runs in the browser on a tablet or computer you already own. There is no long-term contract.
Marketplace apps can still use their own photos, and DoorDash, Uber Eats, and Grubhub often charge 15 to 30% of that sale. Your site is where your photo and your price stay together. Setup is how it works. Restaurants on the platform are on clients. Questions go through contact. Start 30 Day Free Trial. Call (888) 960-1359.